

Cisco DNA Center Software Image Management
Cisco DNA Center Image Repository
One of the most time-consuming tasks for any IT organization is keeping the network devices up to date. Cisco DNA Center includes a range of tools designed to help IT organizations improve efficiency by automating tasks like software management.
The Cisco DNA Center Software Image Management (SWIM) workflow includes two areas:
-
- Image Repository
-
- Image Updates
The Image Repository is how an organization manages the software images, patches, and other updates for devices in inventory. We can download images from Cisco software, import them from network devices in inventory, or upload them from our desktop.
Once a device is added to the Cisco DNA Center inventory, DNA Center will provide a list of images available for selection for that platform. We can then assign a particular image as our «Golden Image.» Cisco DNA Center can then perform a check against devices in inventory, alerting us to devices that are not running the correct image. It will also run prechecks, letting us know of any potential issues before attempting deployment.
Image updates are performed in two steps that can be scheduled separately:
-
- Deployment
-
- Activation
During each of these steps, Cisco DNA Center performs multiple prechecks and postchecks and alerts us to deviations.
In this tutorial, we will choose an image as our Golden Image, and then deploy and activate it.
Define the Golden Image
We already have a Catalyst 9300 in our inventory, so we can now define a Golden Image. The Golden Image is the image defined as the standard for a specific platform and site. This image can also be defined as a standard for a particular device role or tag.
1. Access the image repository by going to Design and Image Repository.
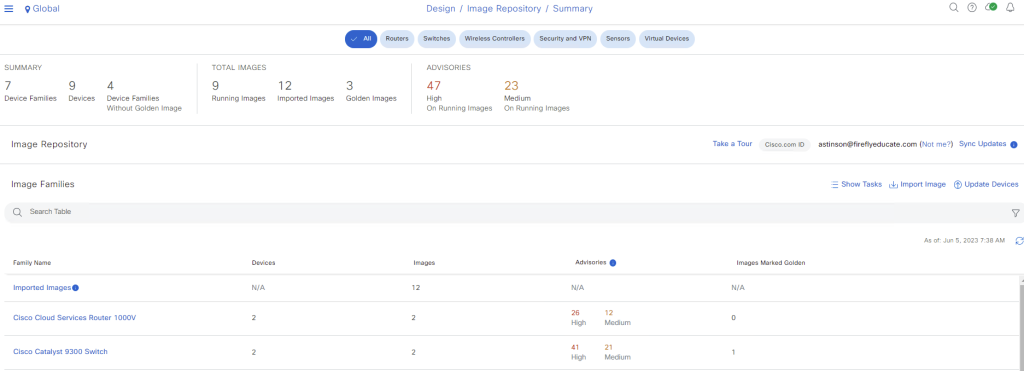
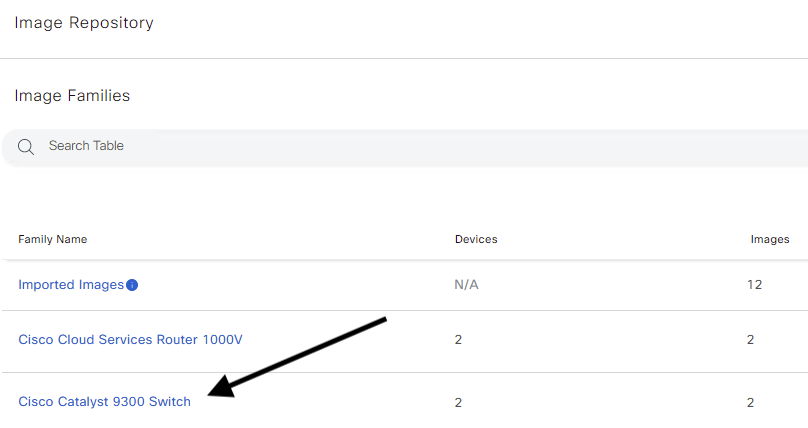
2. In the Image Repository summary, under Family Name, click Cisco Catalyst 9300 Switch to access the Image Family page.
3. If you see the download icon next to the image that you want to deploy, click it. Otherwise, skip to step 5
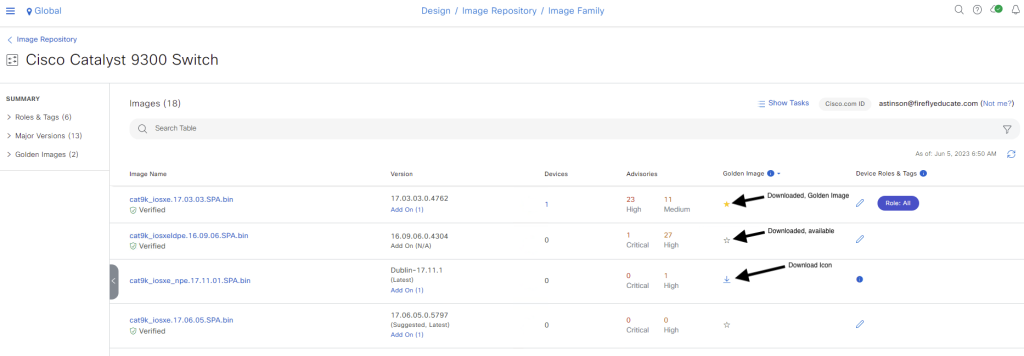
4. Click OK and skip to step 7.

5. We have already downloaded the image we want, IOS XE 17.06.05. Click the empty star icon to make it the Golden Image.
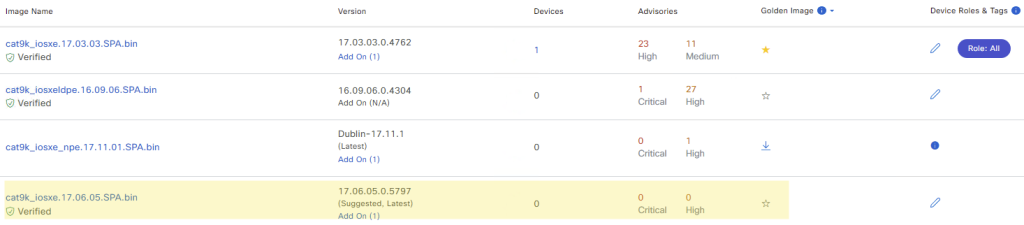
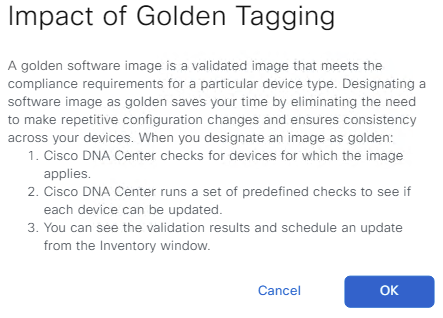
6. Once clicked, we will get a notice of the Golden Image impact. Click OK.
That’s it! We’ve now defined a Golden Image. Cisco DNA Center will start running prechecks on devices that are not running the selected image.
See Upgrade Readiness Prechecks for more details.

Deploy an Image
Now, we will deploy our newly defined Golden Image.
(Optional) Configure a Maintenance Window for the devices to avoid alerts. See the Cisco DNA Center User Guide for more details.
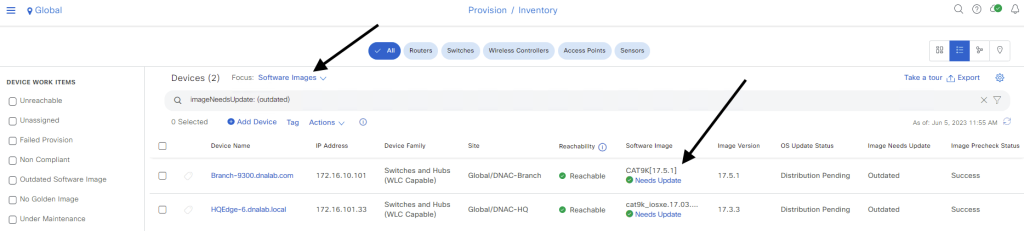
1. Go back to the Image Repository summary screen and click Update Devices.
We now see a list of devices that need to be updated to our Golden Image. We see two devices needing deployment.
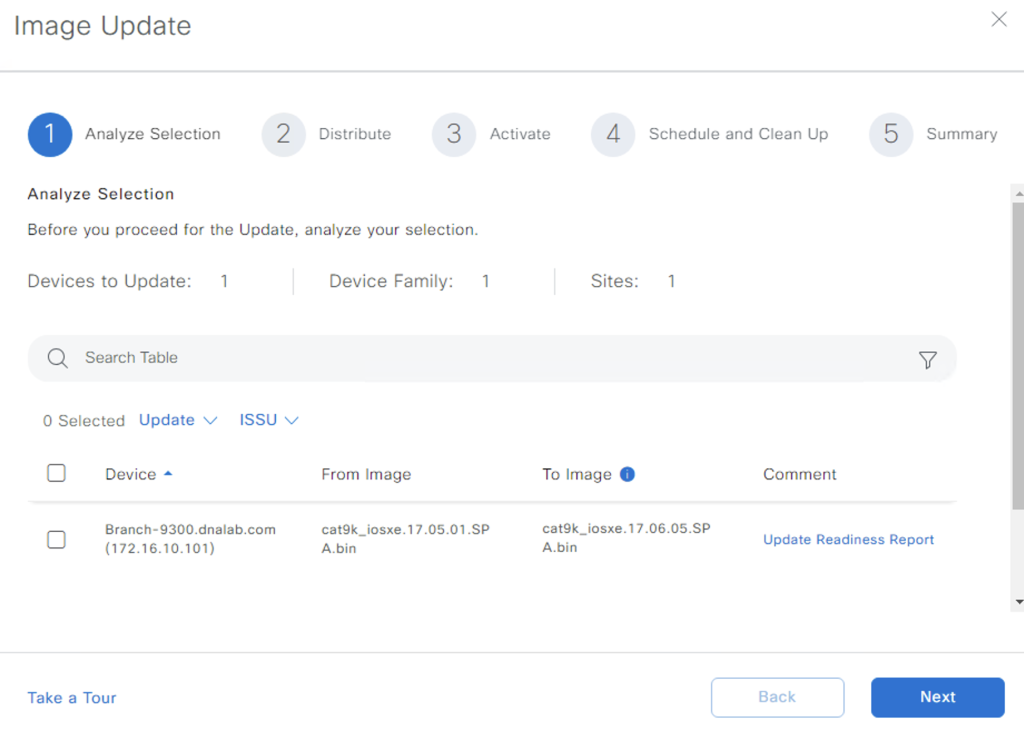
2. Choose the switch to upgrade, and then click Actions, Software Image, and Image Update to start the Image Update workflow.

3. Click Next for steps 1 through 3 to take us to the Schedule and Clean Up step.
Step 1 lets us verify readiness, and steps 2 and 3 give us the option to choose the pre and postchecks that are performed. (We can define our own custom checks if desired.)
4. Schedule the distribution and activation. Each phase can be scheduled separately. We are going to choose to deploy the image Now and activate it After Distribution.
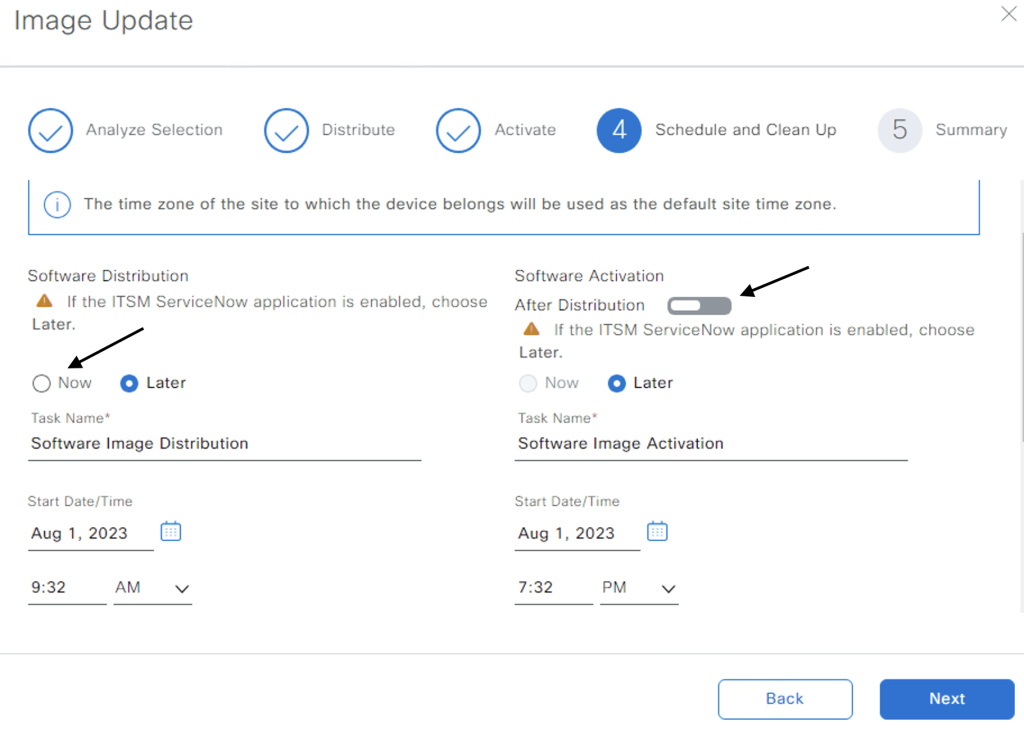
The schedule should appear as follows:

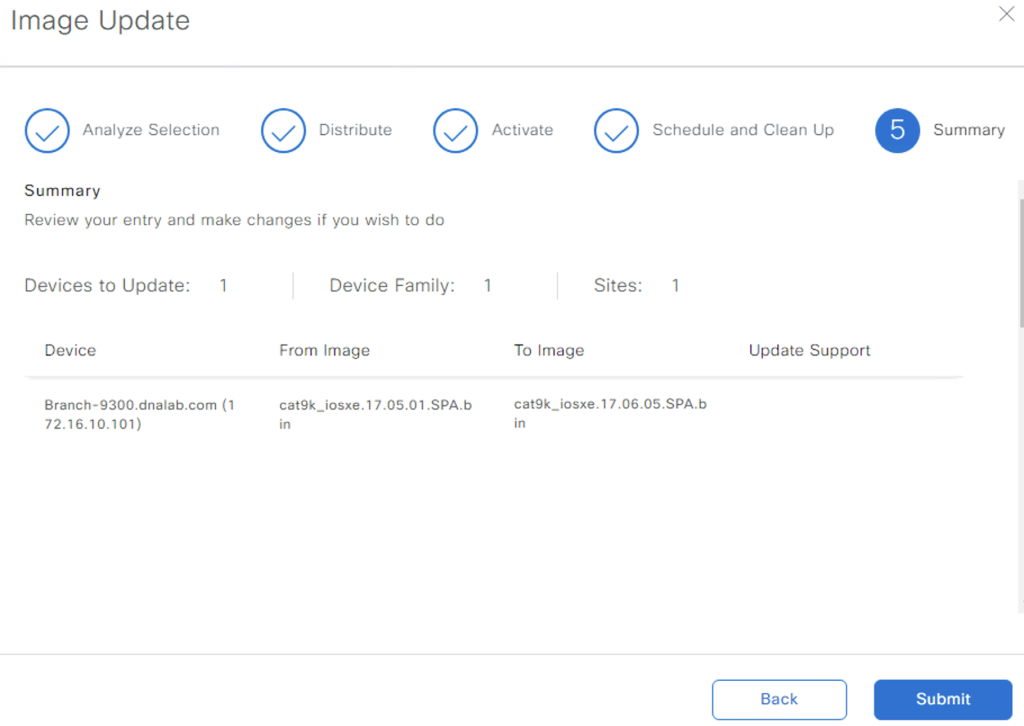
5. After clicking Next, we will see the Summary to verify our settings. Click Submit.
6. Click Continue on the Information pop-up.
That’s it! Our image distribution and activation are scheduled. We can now check the status and verify deployment.
Check Status and Verify Checks
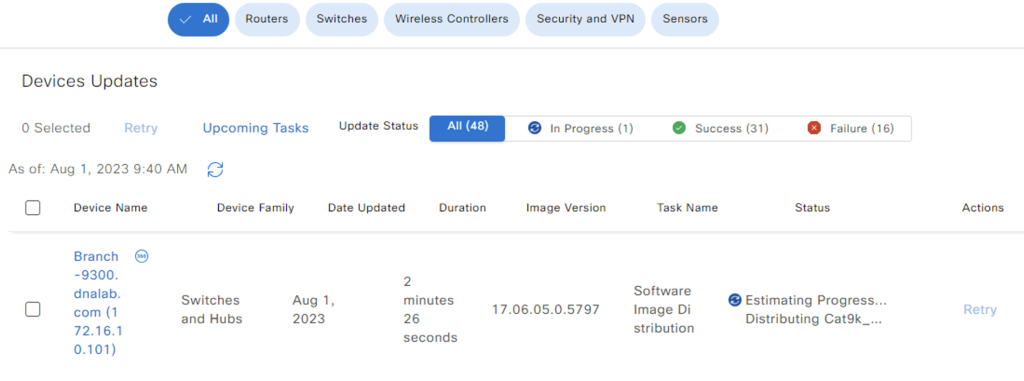
1. To check the status, go to Actions, Software Image, and Image Update Status
2. Choose the device we scheduled to check the details of the deployment.
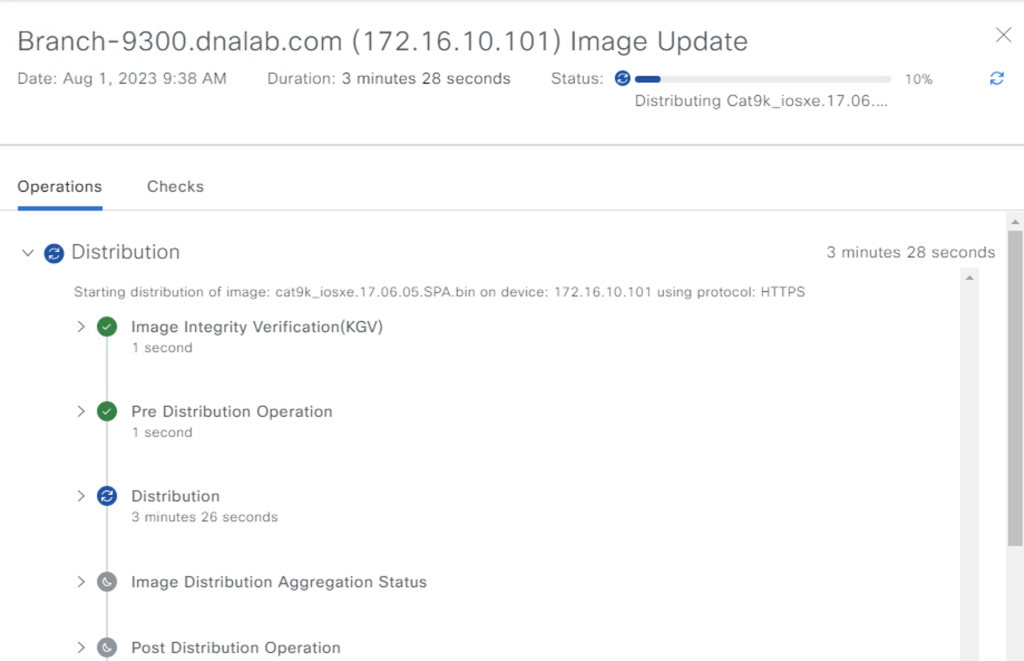
3. Drill down to see the status of each step.
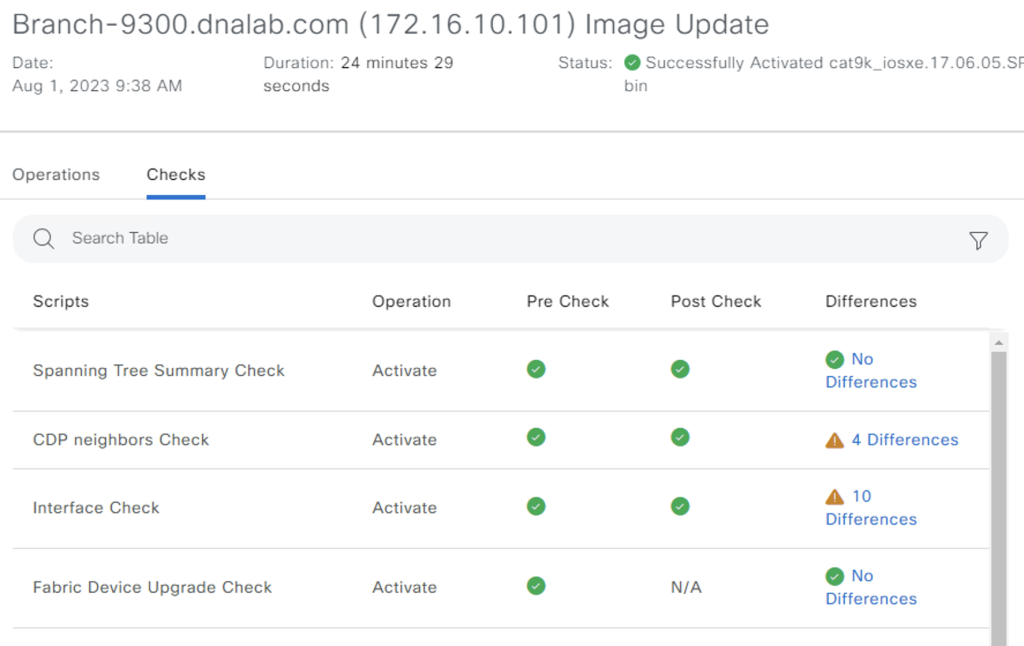
Verify Precheck and Postcheck Differences
Once completed, we can verify that the upgrade was successful by going to the Checks tab and reviewing any differences between the various checks run. CDP Neighbors Check and Interface Check often will show differences related to timers or other dynamic attributes.
Congratulations
We can now continue upgrading the rest of the environment.
For more details about software provisioning with Cisco DNA Center, check out the following:
Cisco DNA Center User Guide: Manage Software Images
Add Image Distribution Servers
Find out more about Firefly here:
Upcoming Firefly Events
Firefly YouTube